

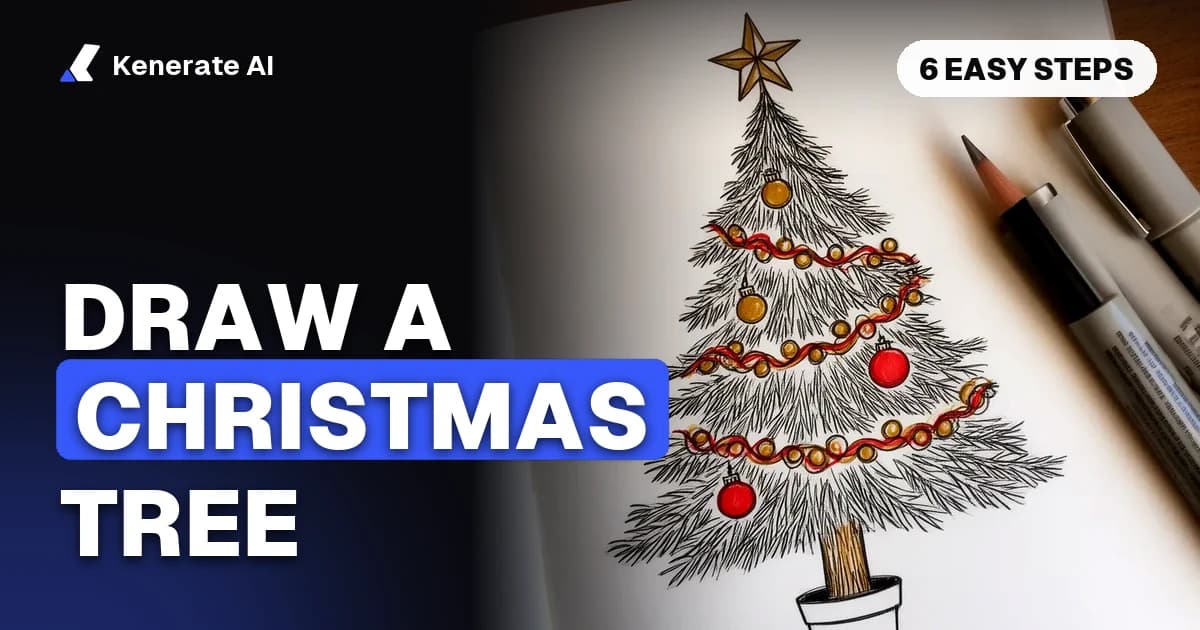
To draw a Christmas tree, stack three or four rounded triangles that get wider toward the bottom, put a star on top and a short trunk or pot underneath, then add garlands, baubles and colour. That easy version takes six steps and about ten minutes. A realistic tree uses the same cone shape but builds it from branches that curve around the trunk and are shaded with soft pencils.
This guide covers both: an easy method for kids and beginners, a realistic pencil method, decoration ideas, the mistakes that make trees look flat, and how to turn your drawing into a coloring page or a finished card with AI. Updated 28 October 2026.
What do you need to draw a Christmas tree?
Not much. Any paper and pencil will do for the easy version. For the realistic one, softer pencils and thicker paper make shading look smoother.
| Supply | Easy tree (kids, beginners) | Realistic tree (pencil) |
|---|---|---|
| Paper | Printer paper or a sketchbook | Thick drawing paper or card, so layered graphite doesn't smudge |
| Pencil | Any HB pencil | A range of soft graphite (about 2B to 8B) |
| Outline | Black marker or felt-tip | Sharpened darker pencil |
| Eraser | Normal eraser | Eraser plus a putty (kneaded) eraser for highlights |
| Colour | Crayons, markers or coloured pencils | Optional: green, gold and red coloured pencils |
| Time | About 10 minutes | 30–60 minutes |
The realistic supply list follows the one in Gathered's step-by-step Christmas tree tutorial, which recommends thick paper, 2B–8B pencils and a putty rubber.
How do you draw an easy Christmas tree step by step?
This is the method most beginner tutorials use, including Easy Peasy and Fun and Easy Drawing Guides. The tree is built from the same shape repeated, which is why it works for children as young as preschool age.
- Draw the top tier. Draw an upside-down V, like a letter A without the crossbar. Join the two open ends with a gentle curve. That's the first tier.
- Add the middle tier. Directly below, draw the same shape again, a little wider. Let its top tuck under the first tier so the tiers overlap.
- Add the bottom tier. Repeat once more, wider again. Three tiers is the classic look; add a fourth for a taller tree.
- Draw the star and trunk. Put a five-pointed star on the very top. Underneath the bottom tier, draw a short rectangle for the trunk, or a pot that is wider at the top than at the bottom.
- Decorate. Draw garlands as pairs of curved lines that swoop across each tier. Add circles for baubles, and a J-shape for a candy cane if you like.
- Outline and colour. Go over the final lines with a marker, erase the pencil, and colour: green for the tree, brown for the trunk, yellow or gold for the star, bright colours for the baubles.
How do you make the easy tree look less stiff?
Swap the smooth curve at the bottom of each tier for a scalloped edge — a row of small bumps, like the bottom of a cloud. It reads as bunches of needles instead of a plastic triangle. Easy Drawing Guides' version uses exactly this trick for the boughs.
What if a five-pointed star is too hard?
Use a simpler topper: a circle with four short lines around it (a shining light), a bow, or an angel shape made from a triangle and a circle. Kids can also stick a paper star on afterwards.
How do you draw a realistic Christmas tree in pencil?
A realistic tree is still a cone, but you draw the branches instead of the outline. Here is the order that keeps it under control, based on Gathered's method.
- Lay down a light framework. Draw a long vertical line for the height of the tree. About three-quarters of the way down, draw a shorter horizontal line to mark where the widest branches will be. Keep both lines very light.
- Sketch the cone. Draw a pointed cone around the vertical line and finish it with a curved base line (the curve makes the tree look round, not flat). Leave a little of the vertical line showing below for the trunk.
- Add a pot or stand. Draw it wider at the top and narrower at the bottom, with a curved base to match the curve of the tree.
- Draw branches from the centre outwards. Near the top, branches point upward. In the middle they stick out sideways. Near the bottom they droop down. Fill the spaces with shorter branches.
- Thicken and taper. Switch to a darker pencil. Make the branches near the trunk thicker and darker, thinning out to light tips. Add short, angled strokes along each branch for needles.
- Shade the gaps. Use a 2B to darken the gaps between branches; this is what makes the tree look full and deep. Keep the tips facing the light lighter.
- Lift the highlights. Shape a putty eraser into a point and dab a few needle tips and the top of each bauble to bring back highlights.
Why do my branches look flat?
Usually because they're drawn as straight horizontal lines. Branches on a real tree wrap around the trunk, so draw them as slight curves — the ones at the front bend toward you and the ones at the sides curve back. Overlapping branches also helps: let some cross in front of others.
How do you shade baubles, tinsel and the star?
- Baubles: shade in a C-shape around one side and leave a small white highlight on the opposite side.
- Tinsel: draw it as a wavy band, then give the edges a fuzzy zigzag.
- Star: shade one half of each point darker than the other so it looks three-dimensional.
- Under the branches: add a dark shadow where the lowest branches hang over the pot.
Don't draw too many branches over the decorations, or they get lost.
What decorations can you add to a Christmas tree drawing?
Decorations are where the drawing becomes yours. Some ideas that are quick to draw:
| Decoration | How to draw it | Good for |
|---|---|---|
| Baubles | Circles with a tiny rectangle cap and hook | Every style |
| Garland / tinsel | Two parallel curved lines across a tier | Easy and realistic |
| String lights | A wavy line with small teardrops or dots along it | Night scenes, cards |
| Candy canes | A J-shape with diagonal stripes | Kids' drawings |
| Star topper | Five-pointed star, or a circle with rays | Every style |
| Bow topper | Two loops and two tails from a small knot | Cute or vintage |
| Presents | Squares and rectangles with a cross ribbon and bow | Bottom of the tree |
| Snow | White gel pen dots, or leave paper blank on branch tops | Outdoor trees |
For a night scene, colour the background dark blue, then add the lights last with a white gel pen and a yellow highlighter around each one so they glow.
What are the most common Christmas tree drawing mistakes?
- Tiers all the same width. The tree looks like a stack of boxes. Each tier should be clearly wider than the one above.
- A trunk that's too long or too thick. Keep the trunk short; most of it is hidden by the bottom branches.
- A perfectly flat bottom edge. Curve it slightly downward at the middle to show the tree is round.
- Pressing hard too early. Sketch lightly first. Dark lines are hard to erase if the shape is wrong.
- Decorations in neat rows. Real trees look better with baubles scattered unevenly, in a few different sizes.
- Forgetting the light source. Decide where the light comes from before shading, and keep the shadows on the opposite side.
Which Christmas tree drawing style should you choose?
| Style | Steps | Skill level | Best for |
|---|---|---|---|
| Stacked triangles (easy) | 6 | Beginner, kids | Classroom activities, quick doodles |
| Scalloped cartoon tree | 6–8 | Beginner | Cards, gift tags, kids' art |
| Minimalist line tree | 3–4 | Any | Modern cards, bullet journals |
| Realistic pencil tree | 7+ | Intermediate | Sketchbook studies, framed art |
| Coloring-page tree | 6 + outline | Any | Printing for kids to colour |
A minimalist tree is the fastest of all: a single zigzag line down a vertical trunk line, a dot on top, done. It works well on handmade Christmas cards.
How can AI help you draw a Christmas tree?
AI won't hold the pencil for you, but it is useful at three points: making a reference to copy, turning a tree into a printable coloring page, and turning your finished sketch into a polished picture. Kenerate AI runs all three in its Image Studio. Here is what each one costs, as of 28 October 2026.
| What you want | Kenerate tool | Model | Credits per image |
|---|---|---|---|
| A tree to copy or trace | Line art generator | Qwen Image 3.0 (free plan) | 9 |
| A printable tree to colour | Christmas coloring pages | Qwen Image 3.0 or Flux 2 Dev (both free plan) | 9 or 3 |
| "Merry Christmas" lettering on the page | AI coloring page generator | GPT Image 2.5 Sunburst | 7.2 (medium, 1K) |
| Your drawing turned into a finished picture | Sketch to image | Seedream 5.0 Pro | 13.5, or 27 at 2K |
New accounts get 25 credits on sign-up, which is enough for a couple of free-plan pages to try this out.
How do you make a Christmas tree reference to trace?
- Open the line art generator (it opens Image Studio).
- Describe the tree and the style, then end with the line-art words, for example: "simple Christmas tree with three tiers, a star and round baubles, black and white line art, bold clean outlines, no shading, no grey, pure white background".
- Pick portrait 3:4 if you'll print it on A4 or US Letter.
- Print it, and copy it freehand or trace it on a light box or a bright window.
Ending the prompt with "no shading, no grey" matters: image models like to add tone, which makes a messy page for colouring or tracing.
How do you turn your drawing into a coloring page or a card?
Photograph or scan your drawing in good light and upload it in Image Studio. Then describe the change you want — for example "clean this up into bold black line art on white, no shading" for a coloring page, or "turn this into a watercolour Christmas card with snow falling" for a card. When a photo is uploaded, Image Studio switches to the model's edit mode, so the model keeps your composition instead of starting from scratch. Seedream 5.0 Pro kept sketch shapes most faithfully in Kenerate's own tests for its sketch-to-image page.
From there, the AI Christmas card generator adds a greeting, and Christmas wallpaper shows how to size a picture for a phone or desktop background. Outputs are PNG or JPG images, not vector files.
How long does it take to learn to draw a Christmas tree?
The easy stacked-triangle tree is learnable in one sitting; most kids get a recognisable tree on the first or second try. A convincing realistic tree takes longer because it depends on shading, which improves with practice. Try drawing the same tree three times — once quickly, once slowly, once with only your darkest pencil — and compare. Each version teaches something different about shape and value.
Sources
- How to Draw a Christmas Tree – Easy Peasy and Fun — stacked-shape method for all ages.
- How to Draw an Easy Christmas Tree – Easy Drawing Guides — scalloped boughs, ribbons and candy cane.
- How to draw a Christmas tree step by step – Gathered — realistic pencil method, materials and shading.
- Kenerate model prices and free-plan models: Kenerate AI app configuration, checked 28 October 2026.