Any picture → transparent PNG layers
Separate Image Into Layers — every element on its own PNG
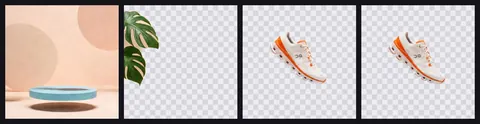
A flat poster, ad or photo, split into a stack of transparent PNG layers — background, subjects, text and effects — that you can hide, move, resize and download one by one.

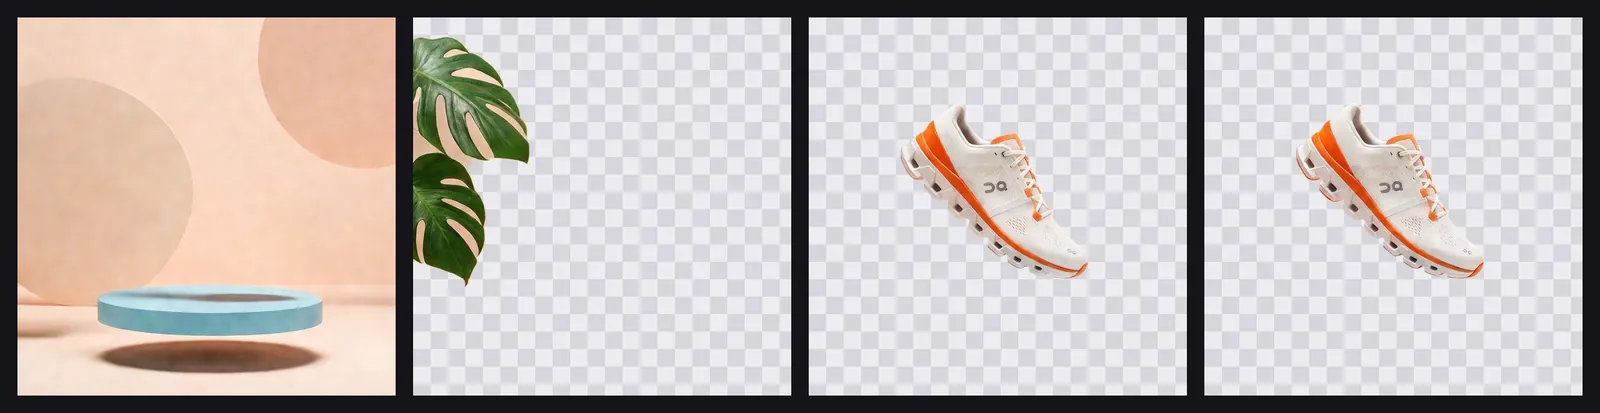
- 2–8 layers, or automatic
- Transparent PNGs
- Move and resize layers
- PNG + ZIP download
Updated by the Kenerate AI team
On this page
Quick answer
Updated
How do you separate an image into layers?
To separate an image into layers, upload it to Kenerate's Image Layer tool and run Kenerate Layer, which splits it into 2–8 transparent PNG layers (4 to start), back to front. Kenerate Layer Pro picks the layer count itself, often 6–12, at up to 2K with cleaner edges. You can then hide, move, resize and download each layer.
Key facts
- Kenerate Layer
- You pick 2–8 layers (4 to start), about 0.4 MP each
- Kenerate Layer Pro
- Automatic count, 1K / 1.5K / 2K
- Output
- Transparent PNGs, back to front
- Views
- Composite · Exploded · Arrange · Grid
- Download
- Each PNG, or a ZIP
- Picture
- JPG, PNG or WebP, up to 25 MB
After the split
What you can do with the layers
Every split opens in a layer viewer. The stack runs back to front: Background, Layer 2, Layer 3 … Front.
Composite
All layers in place; tap Play to watch the picture build up layer by layer.
Exploded
Fans the stack out in 3D so you can see what landed on each layer.
Arrange
Move and scale layers from 25% to 300% and download the new composition as a PNG.
Hide and solo
Toggle layers on and off, solo one, or flip the order.
Download
Save one transparent PNG, or the whole stack as a ZIP.
Edit a layer
Send any layer to Edit Studio to change it with a prompt.
How to
How to separate an image into layers
Four steps; a split takes under a couple of minutes.
- Time needed
- Steps
- 4 steps
- You need
- A web browser · A picture to split
Step 1
Add the picture
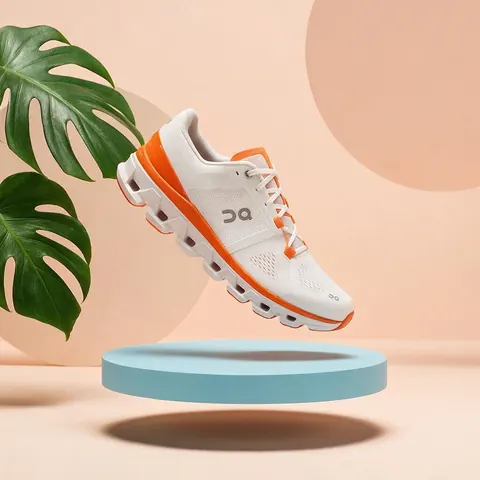
Upload a JPG, PNG or WebP up to 25 MB, or try a sample: Concert poster, Sneaker ad or Street portrait. Sign in with a verified email to run it.
Step 2
Pick the engine
Kenerate Layer: choose 2–8 layers (4 to start). Kenerate Layer Pro: it decides the count; choose 1K, 1.5K or 2K, and Fast mode if you want it quicker.
Step 3
Describe the picture (optional)
Up to 800 characters about what's in it, including anything partly hidden. It helps the cut. Then press 'Split into N layers'.
Step 4
Use the layers
Browse them in Composite, Exploded, Arrange or Grid view, hide or move them, and download each PNG or the ZIP.

Open Image Layer and upload any picture — a photo, poster or ad.


Watch the tour · 1:41
Engines, layer count, stack viewer, exploded 3D, arrange a new composition, PNG & ZIP, gallery & chat
Chapters
Models
Kenerate Layer or Kenerate Layer Pro?
Two engines in the same tool. Open a card to start with that engine picked.
Kenerate
Kenerate Layer
- Output
- About 0.4 MP per layer
The default: you pick 2–8 layers (4 to start)
Open Kenerate Layer
Kenerate
Kenerate Layer Pro
- Output
- 1K, 1.5K or 2K
Decides the layer count itself (often 6–12); clean alpha edges for hair and glass
Open Kenerate Layer Pro
Kenerate Layer returns every layer at about 0.4 MP, whatever the picture's size. For print or large canvases, use Kenerate Layer Pro at 2K. Layers come as PNG files and a ZIP; there's no layered PSD export.
Compared
Image layers vs background removal
Both give you transparent PNGs. They answer different questions.
| Image Layer | Background remover | |
|---|---|---|
| What you get | A stack of 2–8 layers (or automatic) | One cut-out of the main subject |
| Background | Kept as its own bottom layer | Removed |
| Text and effects | Can land on their own layers | Stay with the subject or go with the background |
| Best for | Re-arranging posters, ads and scenes | Product cut-outs, profile photos, stickers |
Kenerate tools, checked 3 October 2026.
Sources: Kenerate Image Layer
Example uses
How creators use separate image into layers
Illustrative examples of typical workflows, not customer reviews.

Social media designer
A social media designer could split a finished ad into layers and move the product to the other side for a new format.
Motion designer
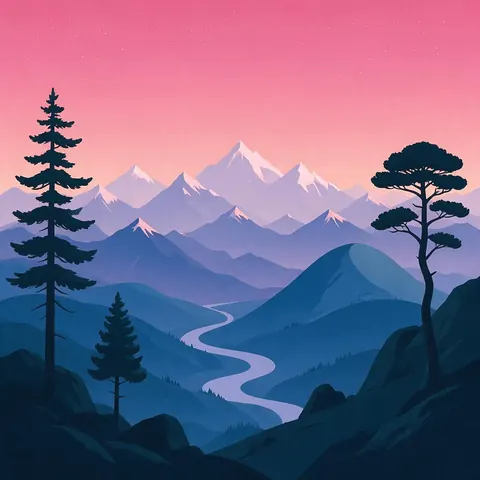
A motion designer could split an illustration into layers to animate a parallax effect.
Presentation maker
A presentation maker could pull the product and background of a photo apart to animate them on separate slides.
FAQ
Image to layers questions
7 questions
Can AI separate an image into layers?
Yes. Kenerate's Image Layer tool splits any JPG, PNG or WebP into transparent PNG layers, ordered back to front from Background to Front. Kenerate Layer lets you choose 2–8 layers; Kenerate Layer Pro decides the count itself, often 6–12, and outputs at 1K, 1.5K or 2K with cleaner edges on hair and glass.
Link to this answerHow many layers can I get?
Between 2 and 8 with Kenerate Layer, where you set the number and 4 is the starting value. Kenerate Layer Pro chooses automatically, and the tool notes it's often 6 to 12 layers. If one object ends up split across two layers, run it again with fewer layers or add a description of the picture.
Link to this answerWhat file format are the layers?
Each layer is a transparent PNG, and you can download them one at a time or all together as a ZIP. There is no layered PSD export: to work in Photoshop, Figma or Canva, import the PNGs and stack them in the same order. Arrange mode can also export a new composition as a single PNG.
Link to this answerIs splitting into layers the same as removing the background?
No. A background remover gives you one cut-out of the main subject and throws the background away. Image Layer keeps everything, putting the background, subjects, text and effects on separate layers you can move and edit. Use the background remover for a quick cut-out, Image Layer to rearrange a whole picture.
Link to this answerCan I edit one layer and put the picture back together?
Yes. Send any layer to Edit Studio to change it with a prompt, or use Arrange mode to move and resize layers from 25% to 300%, hide the ones you don't need and download the new composition as a PNG. You can also stack the downloaded PNGs again in any design app.
Link to this answerWhy are my layers small?
Kenerate Layer returns each layer at about 0.4 MP, around 640 × 640 pixels, whatever the size of your picture. For print or large designs, switch to Kenerate Layer Pro and pick 2K output, or send a layer to the upscaler afterwards. Pro also gives cleaner alpha edges on hair, glass and soft shadows.
Link to this answerDoes describing the picture help?
Often, yes. 'Describe the picture' is optional and takes up to 800 characters; the tool says it helps the cut. Describe the whole image, including things partly hidden behind other objects, such as 'a headline behind the singer's shoulder', rather than trying to assign things to specific layers. It is moderation-checked like every text field.
Link to this answerIn depth
Separating images into layers, explained
What a layer split is, how many layers to ask for, and what to expect from the edges.
On this page
What does it mean to separate an image into layers?
A design file keeps background, subjects, text and effects on separate layers; a JPG or a screenshot flattens them into one. Separating an image into layers reverses that: AI decides which pixels belong together and returns each group as its own transparent PNG, stacked back to front so the layers recreate the picture when shown together.
How many layers should you ask for?
Match the count to the picture. A product on a backdrop needs 2–3 (background, product, shadow); a poster with a person, a headline and graphic shapes needs 4–6; a busy scene can use all 8. Too few and different things share a layer; too many and one object can be split across layers. If you'd rather not decide, Kenerate Layer Pro picks the count itself.
- 2–3: product shots, simple portraits
- 4–6: posters, ads, thumbnails
- 6–8: busy scenes and collages
- Auto: Kenerate Layer Pro
Pictures that split cleanly
Clear, separate elements split best: a subject against a distinct background, bold text over an image, objects that don't overlap much. Hair, glass, smoke and soft shadows are the hardest edges; Kenerate Layer Pro is the engine for those. Describing the picture — including anything partly hidden behind something else — helps the cut.
Rebuild the picture in Arrange
Arrange mode turns the split into a mini layout tool: drag a layer to move it, scale it from 25% to 300%, hide what you don't need, and download the new composition as a PNG. It's a quick way to make a new crop of a poster, move a headline, or resize a product without redrawing it.
Taking layers into other apps
Download the ZIP and drop the PNGs into Figma, Canva, Photoshop, After Effects or a slide deck; each one keeps its transparency, and stacking them in the same order rebuilds the picture. There's no layered PSD file, so place the PNGs as separate layers yourself. Only split pictures you made or have the rights to edit.
Unflatten your picture
Starter credits for new accounts. No subscription required. No watermark.
Tried it? Tell us how it went