


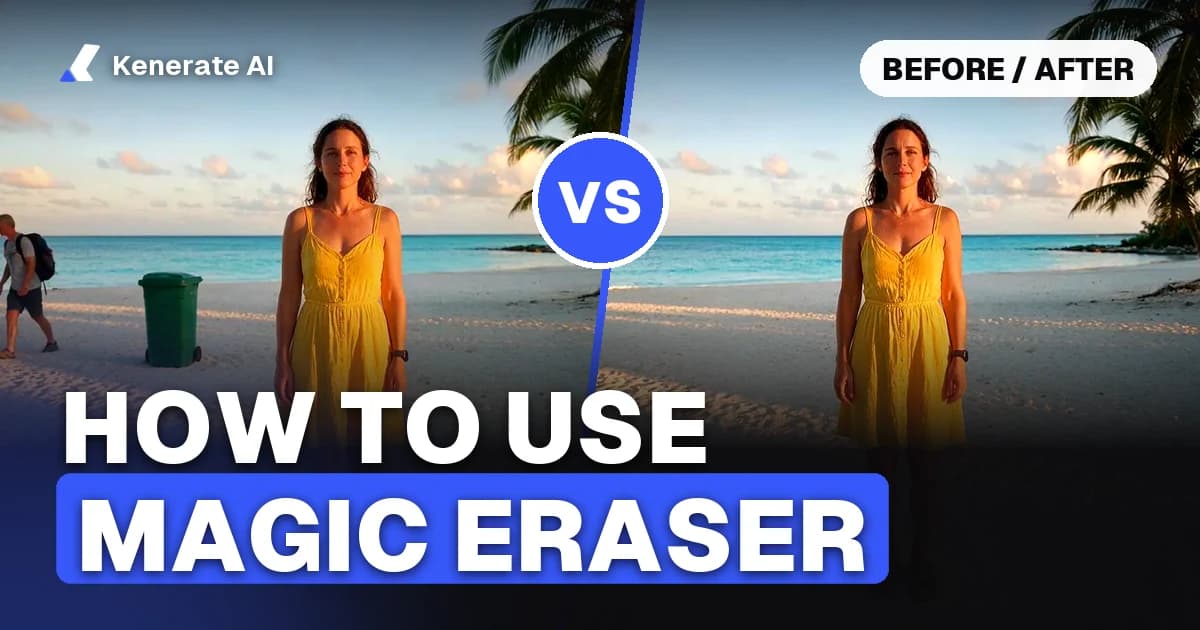
To use Magic Eraser, open a photo in Google Photos, tap Edit, go to Tools and pick Magic Eraser, then tap one of the suggested objects or brush over the thing you want gone and tap Done and Save copy. Samsung (Object Eraser) and iPhone (Clean Up) have their own versions with almost the same steps, and if your phone has none of them you can do the same job in a browser.
This guide walks through each version step by step, as of 31 October 2026: Google Photos on Pixel and other phones, Samsung Galaxy, iPhone, and an online magic eraser for any device. Then it covers what these tools can't do and how to fix a smudgy result.
What is Magic Eraser?
Magic Eraser is Google's tool for removing unwanted people and objects from photos. It first appeared on the Pixel 6 and now lives inside the Google Photos editor. You select a distraction, such as a tourist, a bin or a power line, and the app fills the gap with background that matches the rest of the picture.
"Magic eraser" has also become a generic name. Samsung calls its version Object Eraser, Apple calls its version Clean Up, and many web tools, including Kenerate's online Magic Eraser, use the same name. They all work the same way: you mark what should disappear, and an AI model paints in what is probably behind it.
Which magic eraser can you use on your device?
Here is a quick map before the steps. Prices and requirements were checked on each company's own pages on 31 October 2026.
| Tool | Where it lives | Devices | Cost |
|---|---|---|---|
| Google Photos Magic Eraser | Google Photos app → Edit → Tools | Pixel phones; other Android phones and iPhones with at least 3 GB RAM and Android 8.0 / iOS 15 or later; Chromebook Plus | Free (no subscription since Google's 2024 rollout) |
| Google Photos Magic Editor (Erase) | Google Photos app → Edit → Magic Editor | Same as above, availability varies by device | Free with a monthly save limit on non-Pixel devices |
| Samsung Object Eraser | Gallery app → Edit → More options | Galaxy phones on recent One UI versions | Free, built in |
| Apple Clean Up | Photos app → Edit → Clean Up | iPhone 15 Pro / 15 Pro Max, iPhone 16 and later; iPad with A17 Pro or M1; Mac with M1 or later | Free, built in (Apple Intelligence) |
| Kenerate Magic Eraser | Browser, Edit Studio | Any device with a browser | Credits: 25 free on sign-up; credit packs from $15 |
How do you use Magic Eraser in Google Photos?
Google made Magic Eraser, Photo Unblur and Portrait Light available to all Google Photos users without a Google One subscription, starting on 15 May 2024. According to Google's announcement, your device needs at least 3 GB of RAM and Android 8.0 or iOS 15 (or a Chromebook Plus on ChromeOS 118+), and availability still varies by device.
- Update Google Photos. Older versions may not show the tool.
- Open the photo you want to clean up and tap Edit.
- Swipe to Tools in the bottom menu and tap Magic Eraser.
- Wait for suggestions. Google Photos often scans the picture and highlights people or objects it thinks you want removed. Tap a suggestion, or tap Erase to remove all of them.
- Brush or circle the rest. If the object isn't suggested, drag your finger over it, or draw a loose circle around it. Smaller strokes give more control.
- Check the result, then tap Done and Save copy so your original stays untouched.
Magic Eraser works only on photos, not on videos or GIFs.
What is the difference between Magic Eraser and Magic Editor?
Google itself draws the line in its editing tips: Magic Eraser is for quick fixes on smaller parts of a photo, such as people or objects in the background of a landscape. For larger or more complex foreground objects, Magic Editor's Erase option usually does better, because it uses a bigger generative model and can rebuild more of the scene. In Google's 2024 announcement, the monthly save limit for non-Pixel users applied to Magic Editor, not to Magic Eraser.
What does Camouflage do?
Camouflage sits next to Magic Eraser on many devices. Instead of deleting an object, it shifts its colours so it blends into the background. It is useful for things you can't remove cleanly, like a bright red sign on someone's shirt or a neon bin right next to your subject.
How do you use Object Eraser on a Samsung Galaxy?
Samsung's version is built into the Gallery app. Samsung's own support guide lists these steps:
- Open the Gallery app and pick a photo.
- Tap the pencil icon to edit.
- Tap the three-dot icon (More options).
- Tap Object Eraser.
- Highlight the area you want to remove, then tap Erase.
- Tap Done, then Save.
If you don't see Object Eraser, the menu depends on your One UI version and region. On some phones it is switched off under More options → Labs in the photo editor, and on newer Galaxy AI phones the generative version may sit behind the AI (sparkle) icon as Generative Edit. Samsung notes its guides are written for specific regional models, so the wording on your phone can differ slightly.
How do you remove objects on iPhone with Clean Up?
Apple's equivalent is Clean Up in the Photos app, part of Apple Intelligence. Apple's requirements page lists iPhone 16 models, iPhone 15 Pro and iPhone 15 Pro Max, running iOS 18.1 or later (iOS 18.4 in the EU). It also works on iPads with an A17 Pro or M1 chip and Macs with M1 or later. It doesn't currently work on devices bought in mainland China.
- Open the photo in Photos and tap Edit.
- Tap Clean Up (on newer iOS versions you may find it under Tools).
- Wait a moment: Photos may highlight objects it suggests removing. Tap a highlight to remove it.
- Otherwise tap, brush or circle what you want gone.
- Tap Undo if a removal goes wrong, then Done to save. You can later reopen the editor and tap Reset (or Revert) to get the original back.
Apple notes that brushing over a person's face may pixelate it rather than erase it, which is useful for hiding faces of strangers in a crowd. On older iPhones without Apple Intelligence, you can install Google Photos and use its Magic Eraser instead.
How do you use a magic eraser online, on any device?
If your phone has none of these tools, or you are on a laptop, you can do the same thing in a browser. On Kenerate AI there are two ways:
Paint it with Magic Eraser.
- Open Magic Eraser (Edit Studio) and upload your photo.
- Brush over the object you want removed. Cover its shadow and reflection too.
- Pick a model. Seedream 5.0 Pro is the default; Nano Banana 2.1, GPT Image 2 and others are also available.
- Generate, compare with the original, and download. There's no watermark.
Describe it in words. In AI Edit you can skip the brush and write something like "remove the two tourists and the green bin, fill with the same empty sand, keep everything else exactly the same". That is how the examples on our AI object remover page were made: tourists, power lines and desk clutter removed from text alone.
What it costs, from Kenerate's model config as of 31 October 2026:
| Model | Credits per edit | Notes |
|---|---|---|
| Qwen Image 3.0 (AI Edit, by text) | 9.9 with one photo | On the free plan |
| Seedream 5.0 Pro (Magic Eraser default) | 13.5 at 1K, 27 at 2K | Needs a credit pack |
| Nano Banana 2.1 | 21 at 1K | Needs a credit pack |
| GPT Image 2 | Varies by quality and size | Needs a credit pack |
New accounts get 25 free credits, which covers two text-based removals with Qwen Image 3.0. The brush-based Magic Eraser models need a one-time credit pack, which starts at $15 for 1,300 credits; there's no subscription. The exact cost always shows before you generate.
What can't Magic Eraser do?
Every version of the tool guesses what was behind the object. That guess is good for simple backgrounds and weaker for complicated ones. Expect trouble with:
- Big foreground objects. Removing someone standing right in front of the camera leaves a large hole the model has to invent. Use Magic Editor, Generative Edit or a text-based edit instead.
- Busy patterns. Brick walls, text on signs, crowds and fences often come back warped.
- Objects touching your subject. A hand on a shoulder or a bag strap across a body is hard to remove without changing the person.
- Video. Magic Eraser, Object Eraser and Clean Up work on still photos only. For clips you need a video tool such as remove object from video.
- Redaction. An erased area can still show traces of what was there, so don't rely on any magic eraser to hide sensitive information. Use a blur or solid box for documents, plates and screens.
Why does Magic Eraser leave a smudge, and how do you fix it?
A blurry patch or a ghost outline is the most common complaint. These fixes work across all the tools:
- Erase the shadow too. A shadow or reflection left behind is the most obvious giveaway. Brush over it separately.
- Use smaller strokes. Remove a large object in two or three passes instead of one big swipe.
- Undo and try again. The result changes from run to run; a second attempt is often cleaner.
- Crop first. If the object is at the edge of the frame, cropping it out is cleaner than erasing it.
- Switch to a stronger tool. Move from Magic Eraser to Magic Editor (Google), Generative Edit (Samsung) or a text-based AI edit, and say what should fill the gap, for example "fill with clear blue sky".
- Sharpen afterwards. If the patched area looks soft next to the rest of the photo, run the image through an unblur tool at the end.
Is it OK to use Magic Eraser on any photo?
Clean up your own photos freely. Two lines are worth respecting: don't remove watermarks from other people's work, and don't edit photos in a way that misrepresents a real event or a real person, such as removing someone from a news photo. For removing a person from your own holiday pictures, our step-by-step guide on how to remove a person from a photo covers iPhone, Photoshop and AI methods in more detail.
The short version
- Pixel or any Android/iPhone with Google Photos: Edit → Tools → Magic Eraser → tap or brush → Done → Save copy.
- Samsung Galaxy: Gallery → Edit → More options → Object Eraser → highlight → Erase → Save.
- iPhone 15 Pro, 16 or later: Photos → Edit → Clean Up → tap or brush → Done.
- Laptop or any browser: Kenerate Magic Eraser by brush, or AI Edit by text, no watermark.
Whichever you use, save a copy rather than overwriting the original, erase shadows along with objects, and switch to a generative edit when the object is large.