Explainer · mask or prompt · inpaint in the browser
AI Inpainting — paint over one area, describe what goes there
Inpainting regenerates one part of a picture and leaves the rest alone: a new sky, a different jacket, a fixed hand, an empty wall where a sign was. Here is how it works, when to paint a mask and when a sentence is enough, and how to do it online.
- Only the painted area changes
- Smart select or brush
- 9 editing models
- No watermark
Updated by the Kenerate AI team



On this page
Quick answer

What is AI inpainting?
AI inpainting is image editing where you mark an area inside a picture and an AI model repaints only that area — replacing, fixing or removing what is there — while matching the light, perspective and texture around it. The frame stays the same size; that is the difference from outpainting, which paints outside the edges. On Kenerate you inpaint in Edit Studio with Change Region: tap or brush the area, describe what should appear, and press Generate. Default model Seedream 5.0 Pro, 13.5 credits per result.
Key facts
- What it does
- Regenerates a marked area inside the frame
- On Kenerate
- Change Region in Edit Studio (/app/edit)
- Mark the area
- Smart select (tap or name it) · Brush 4–120 px
- Default model
- Seedream 5.0 Pro · 9 models to pick from
- Credits
- 13.5 per result (Seedream 5.0 Pro)
- Removal only
- Magic Eraser (same mask, no prompt)
- Free start
- 25 starter credits on sign-up
- Watermark
- None
Gallery
What Change Region's model does with an area
Real Seedream 5.0 Pro edits — the model Change Region uses by default. Each one rebuilt a part of the photo to match its surroundings and left the rest alone. These were made by describing the area in words; in Change Region you paint it instead, which pins the edit down.
Same prompt
Before and after
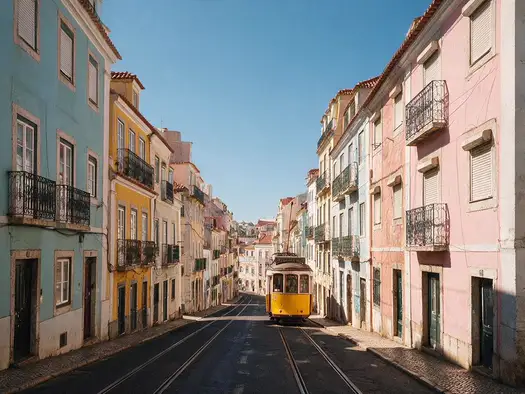
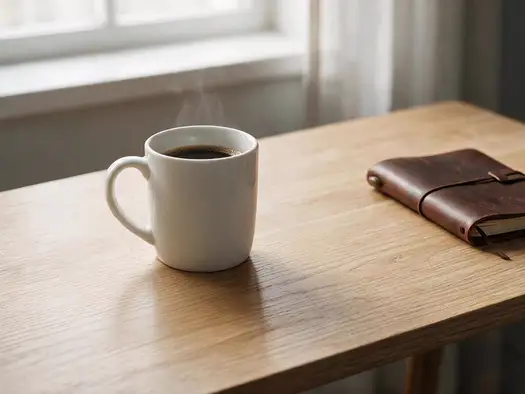
Two photos, one area each: the sky behind the wires and the desktop under the clutter, repainted by Seedream 5.0 Pro. The tram, houses, mug and notebook didn't move.
PromptFill with clear blue sky and the same road surface. Keep the houses, balconies, the yellow tram, the light and the framing exactly the same.
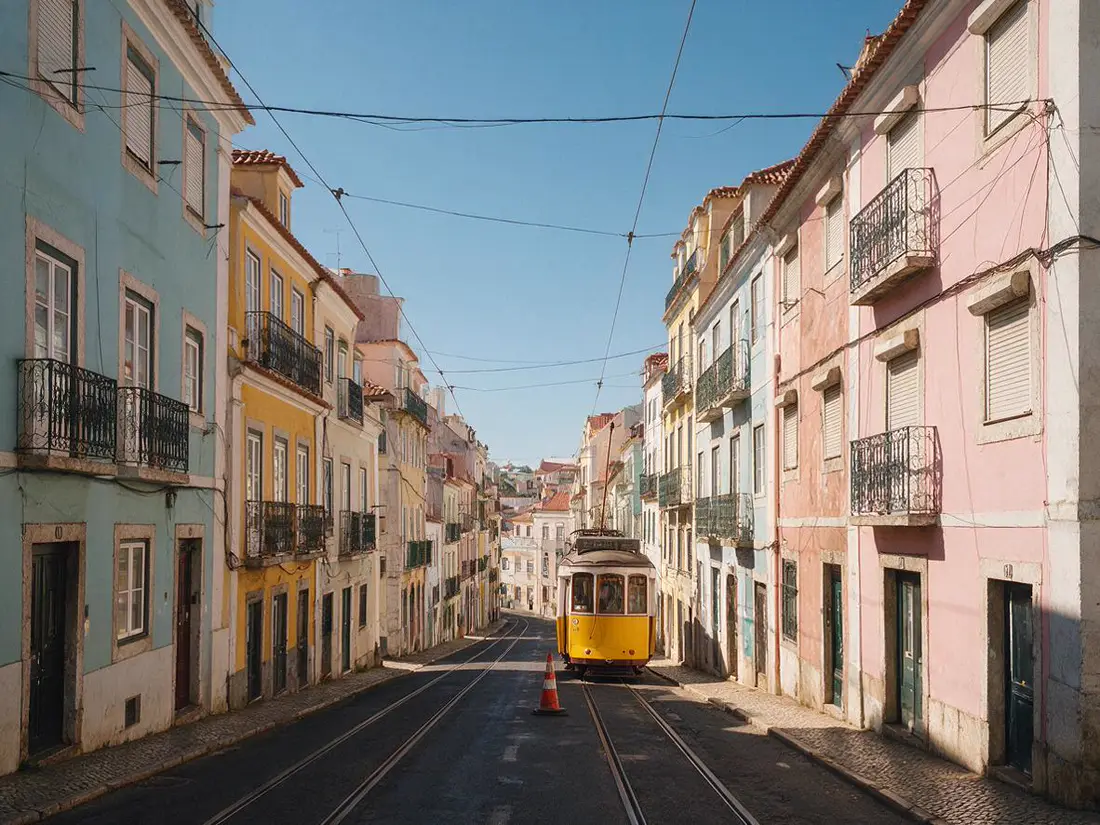 Street, beforeWires across the sky
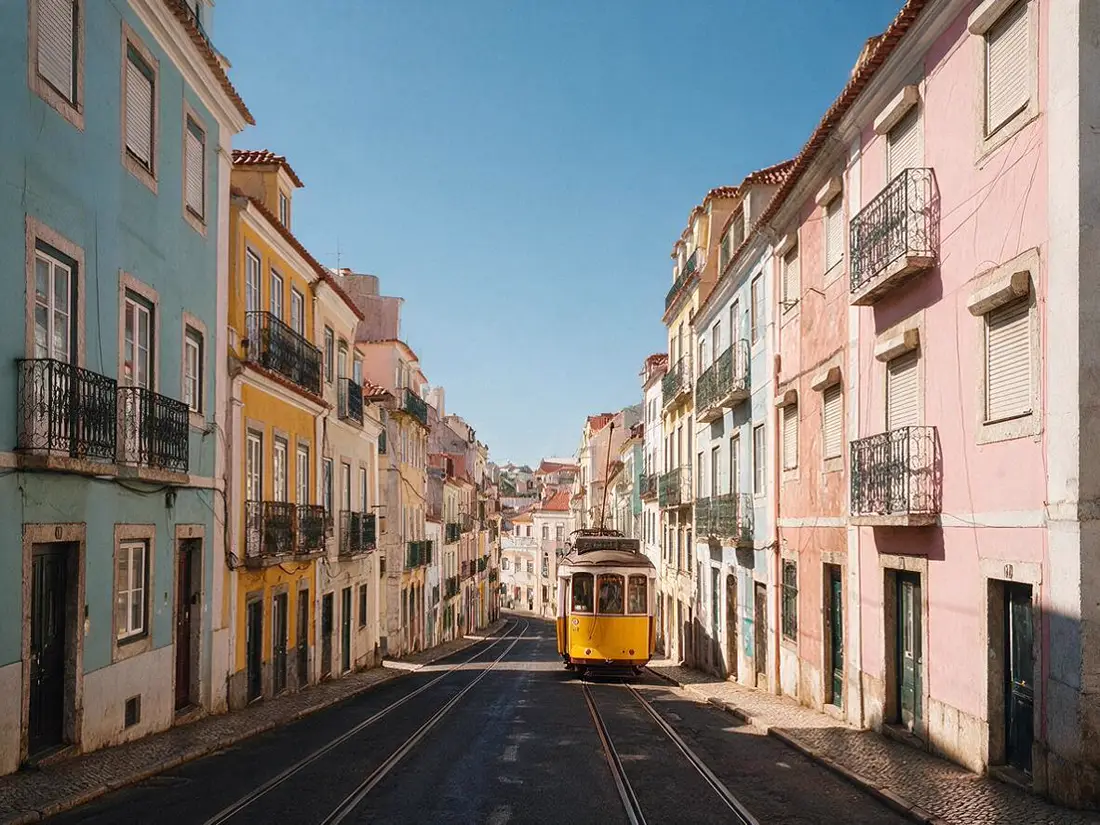 Street, afterSeedream 5.0 Pro
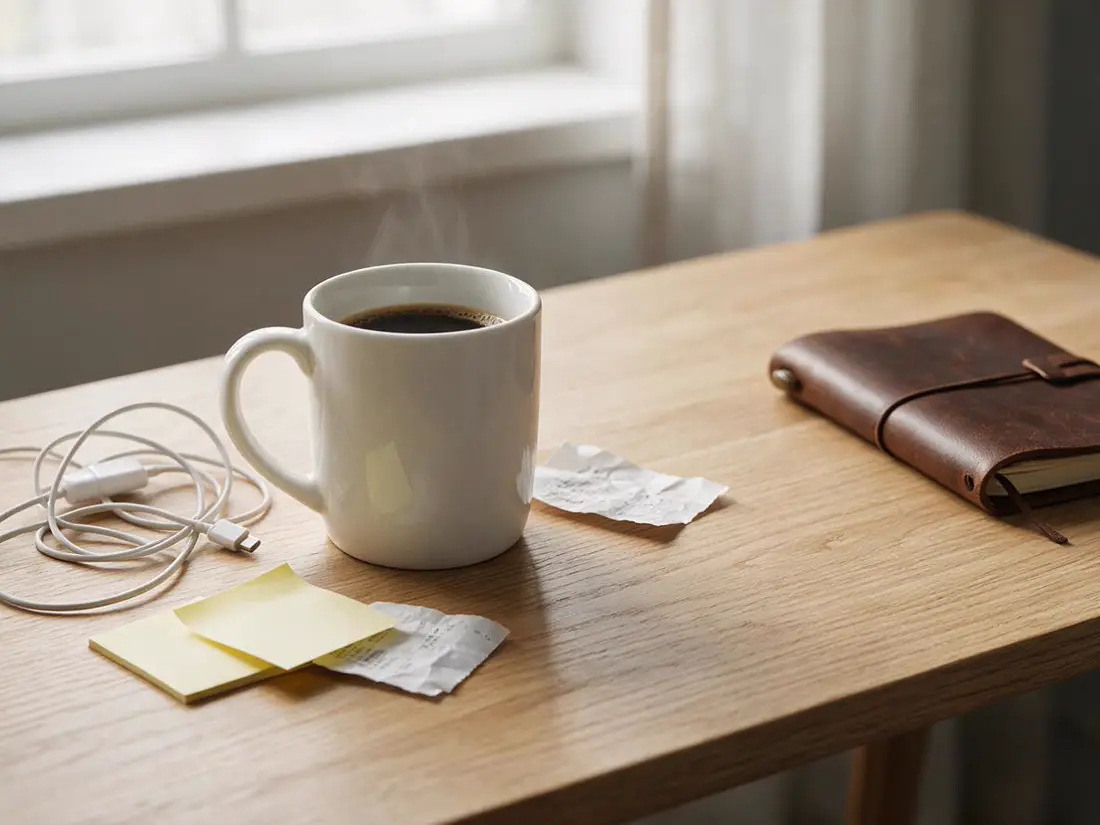 Desk, beforeCable, notes, receipts
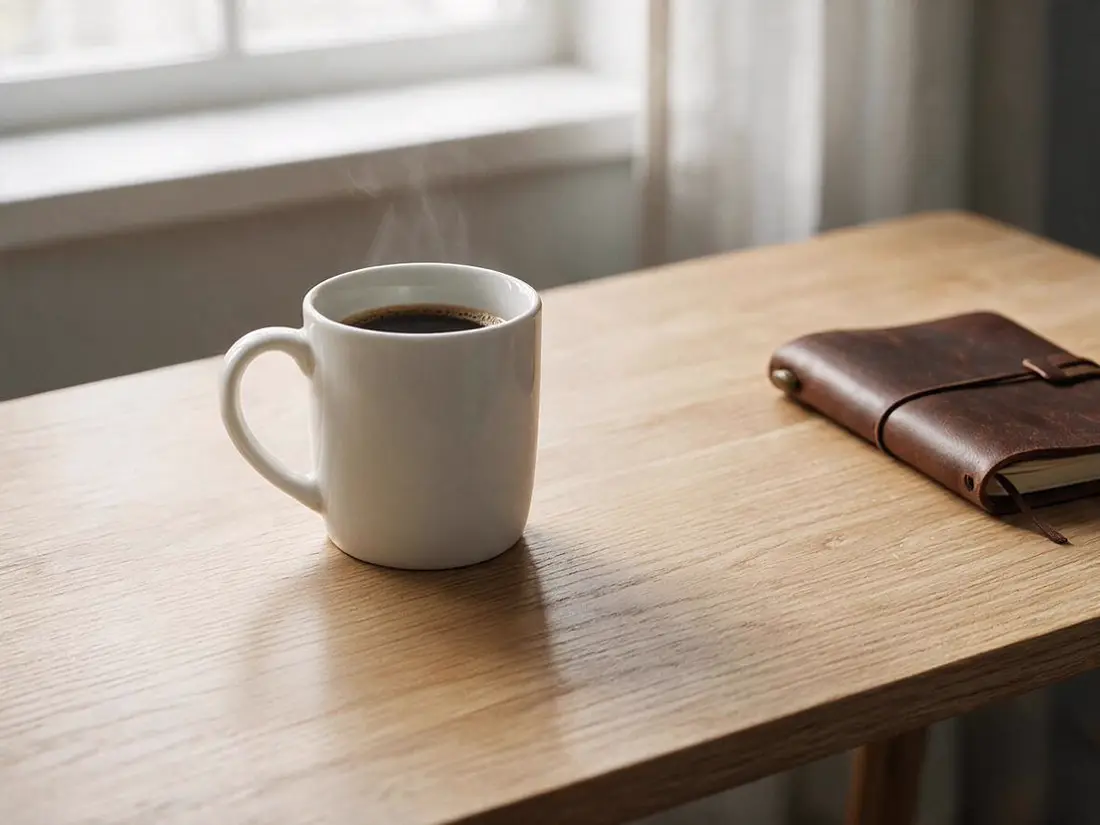 Desk, afterSeedream 5.0 Pro
How to
How to use the AI inpainting
- Time needed
- Steps
- 4 steps
Step 1
Open Edit Studio
Go to /app/edit in any browser and pick Change Region. Sign in free for 25 starter credits.
Step 2
Upload the photo
Drop in a JPG or PNG — the picture you want to keep, apart from one area.
Step 3
Mark the area
Tap it with Smart select, type its name, or switch to the brush (4–120 px) and paint over it. E erases the mask.
Step 4
Describe what goes there
One clear sentence about the new content, its material and light. The studio adds the keep-everything-else instructions.
See it in the app

Open Edit Studio and upload an image, or pick one from your history.


Watch the tour · 2:01
AI Edit, Magic Eraser, Change Region, light, style, expand, camera angle & chat edits
Chapters
Tips
Get a clean inpaint
What separates a seamless patch from an obvious one.
Mark a little more than the object — a few pixels past its edge and over its shadow — so the model has room to blend.
Describe what should be there, not what to change: “a navy wool coat with brass buttons”, not “make it different”.
Name the material and light: “matte”, “wet”, “in soft window light from the left” keeps the patch from looking pasted on.
Use Smart select for whole objects (a car, a jacket, the sky) and the brush for thin or odd shapes.
Do one area per run. Two changes in one mask make the model guess which description goes where.
Patch looks off? Run the same mask on Nano Banana 2.1 or GPT Image 2.5 Sunburst from the model menu.
Only edit photos you have the right to change, and don't use edits to mislead.
Models
Models inside Change Region
What each model is good at. Open any one straight in the generator.
ByteDance
Seedream 5.0 Pro
- Reference images
- Up to 10
- Output
- Up to 2K
Open Seedream 5.0 ProBest for
Change Region default; used for the examples

OpenAI
GPT Image 2.5 Sunburst
- Reference images
- Up to 16
- Output
- 1K–4K
Open GPT Image 2.5 SunburstBest for
Literal, instruction-following repaint on tricky edges
Google
Nano Banana 2.1
- Reference images
- Up to 14
- Output
- 1K–4K
Open Nano Banana 2.1Best for
Strong at keeping the rest of the photo identical
OpenAI
GPT Image 2
- Reference images
- Up to 16
- Output
- 1K–4K
Open GPT Image 2Best for
Also in the Change Region model menu
FAQ
AI Inpainting questions
8 questions

What is inpainting in AI?
Inpainting is AI editing that regenerates a marked area inside an image. You select the area — by painting a mask or describing it — and the model fills it with new content that matches the surrounding light, perspective, colour and texture, while the rest of the picture stays as it was.
Link to this answerWhat is the difference between inpainting and outpainting?
Inpainting works inside the frame: it replaces or fixes an area, and the image keeps its size. Outpainting works outside the frame: it paints new area past the edges, so the image gets bigger. On Kenerate, inpainting is Change Region and Magic Eraser in Edit Studio; outpainting is Expand Image.
Link to this answerDo I need to paint a mask to inpaint?
No, but it helps. Prompt-only editing (AI Edit) works when the area is easy to name, such as “the sky” or “his shirt”. A painted mask (Change Region) is better when there are several similar things, odd shapes or exact edges, because it tells the model precisely where to work.
Link to this answerHow does Kenerate's Change Region inpaint?
When you press Generate, the model gets three images: your photo, a copy with the marked area washed in red, and a white-on-black mask of that area. With them goes an instruction to change only the marked area into what you described, blend it with matching lighting, shadows, perspective, colour and grain, and keep every other pixel the same.
Link to this answerHow much does inpainting cost on Kenerate?
Change Region with its default model, Seedream 5.0 Pro, uses 13.5 credits per result. GPT Image 2.5 Sunburst uses 20.7 and Nano Banana 2.1 uses 21 at 1K. New accounts get 25 starter credits, credit packs are one-time with no subscription, and a failed run is refunded automatically.
Link to this answerCan inpainting remove objects?
Yes — removal is inpainting with “what would be behind it” as the new content. Kenerate has a dedicated tool for that, Magic Eraser: same mask, no prompt, and it also takes out the object's shadow and reflection.
Link to this answerCan I fix hands or faces with inpainting?
Yes. Mark only the hand (or the eyes, or the teeth) and describe it plainly, for example “a relaxed left hand with five fingers resting on the table”. A small, tight mask and one area per run give the best results; try a second model if the first attempt isn't right.
Link to this answerWill inpainting change the rest of my photo?
The instruction is to leave every pixel outside the area identical. Because the model returns the whole image, very fine detail elsewhere can differ slightly, so compare the result with your original before you use it.
Link to this answerIn depth
AI Inpainting, explained
What works, what to avoid, and how to pick a model.
On this page
What is inpainting?
Inpainting began as a restoration term: conservators filling the damaged parts of a painting so the gap disappears [1]. In digital images it means reconstructing a missing or unwanted region from what surrounds it. AI image models made it generative — the filled area can be something new, not just a continuation of the background [2].
People now use the word for three related jobs: replacing something (a new sky, a different outfit), repairing something (a hand, a scratch, a blown-out patch) and removing something (a person, a sign, a wire).
Mask-based vs prompt-based inpainting
There are two ways to tell the model where to work:
- Mask-based — you paint or select the area. Exact, works on odd shapes and on one of several similar objects. Kenerate: Change Region and Magic Eraser.
- Prompt-based — you name the area in words (“the sky”, “the red mug”). Faster, no selecting, but the model decides the edges. Kenerate: AI Edit, default Qwen Image 3.0, 9.9 credits with one photo.
- Start with words when the area is obvious; switch to a mask when the model touches the wrong thing.
What makes an inpaint look seamless
The patch has to agree with the photo in four ways: light direction, perspective, colour and grain. Change Region asks for all four in its instruction, but the mask and description decide most of it. A mask that hugs an object too tightly leaves a halo of the old edge; a description that skips the material or the light gets a patch that looks pasted on.
Big areas are harder than small ones: the more the model has to invent, the more it can drift from the scene. Inpaint large changes in two or three smaller passes.
By the Kenerate AI teamLast updated and reviewed
We build and run the Kenerate generator. Every example is a real output of the model named under it; models and presets were checked against the app's code.
Sources: Adobe — What is inpainting? (Photoshop) · Wikipedia — Inpainting · Wikipedia — Stable Diffusion (inpainting and outpainting) · Kenerate Edit Studio