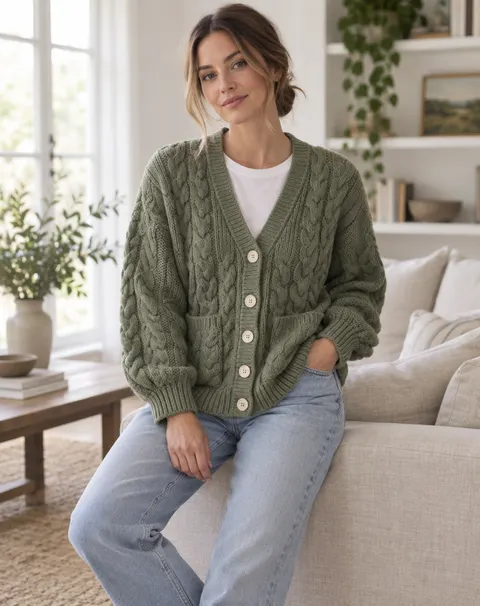

Shirts · dresses · knitwear · white packshot · on model
Clothing Photography AI
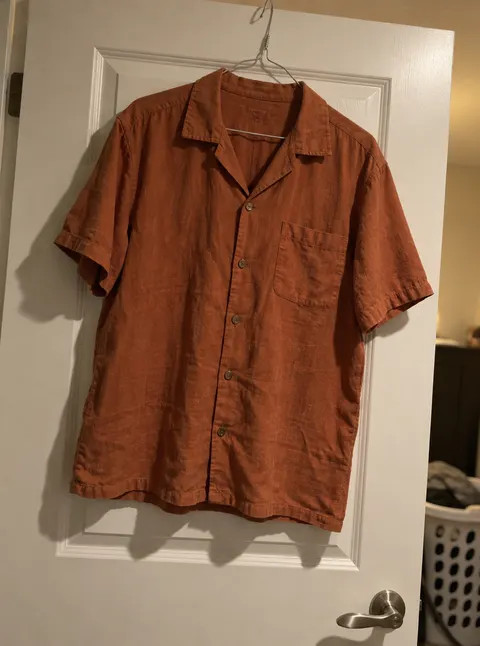
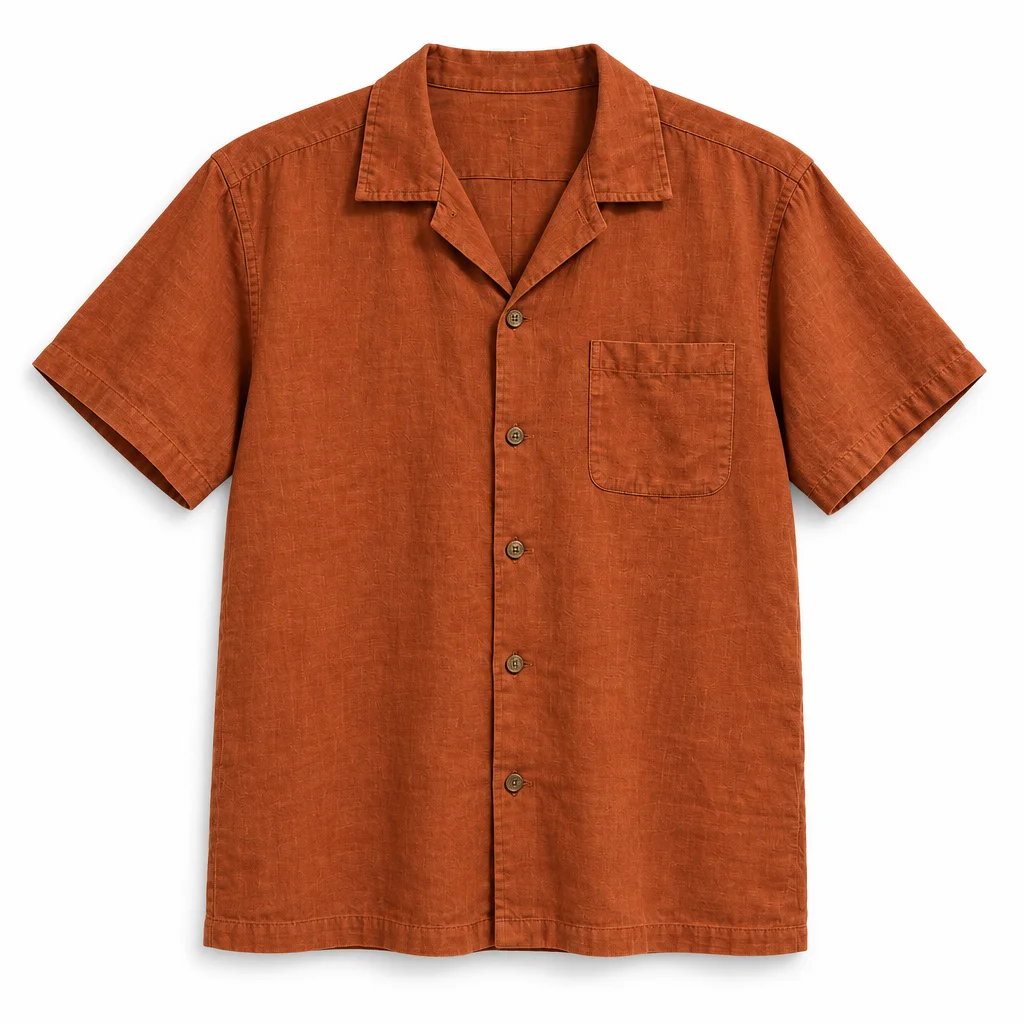
Upload a phone photo of a garment on a hanger. The AI removes the door, the hanger and the creases and gives you a white packshot or the garment worn by a generated adult model, keeping the colour, collar, buttons and pockets.
- Pure white background
- On-model shots, adult models
- Collar, buttons, pockets kept
- No watermark
Updated by the Kenerate AI team




On this page
Quick answer
How do I make clothing product photos with AI?
Clothing photography AI turns a phone photo of a garment into shop photos. On Kenerate, upload the photo with GPT Image 2.5 Sunburst (11.7 credits at 1K) and the packshot instruction: it removes the hanger and door and returns the garment flat on white (RGB 254), or worn by a generated adult model. Our shirt kept its five buttons and pocket; check the colour.
Key facts
- Starts from
- A phone photo of a garment on a hanger or laid flat
- Makes
- White packshot · on-model shot · lifestyle shot
- Best model in our shirt test
- GPT Image 2.5 Sunburst
- Background
- RGB 254 (Sunburst) · 255 (Nano Banana 2.1)
- Watch for
- Colour, button count, pocket side
- Shape
- 1:1 for shops · 4:5 for Instagram
- Watermark
- None
Before / after
Clothing photography AI: real before and after
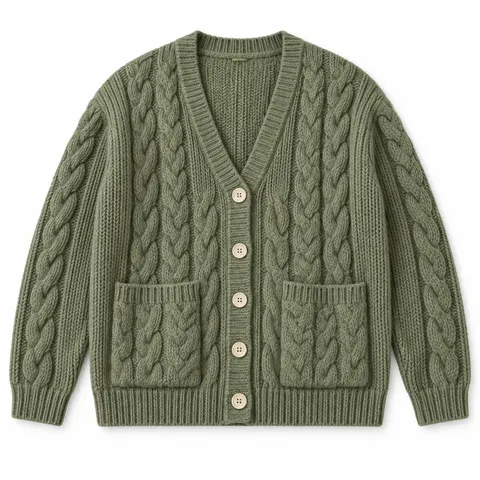
Phone photos of a shirt on a door and a cardigan on a bed, turned into white packshots and on-model shots, one try each. Drag the slider to compare.
Gallery
The second model in our shirt test
Nano Banana 2.1 on the same shirt photo and prompt. Open it to copy the prompt.
Same prompt
Same shirt, two models
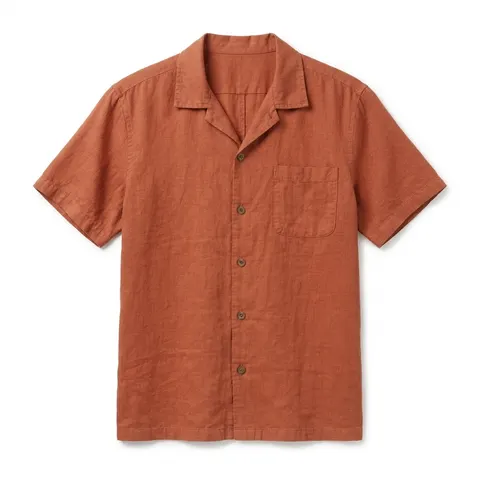
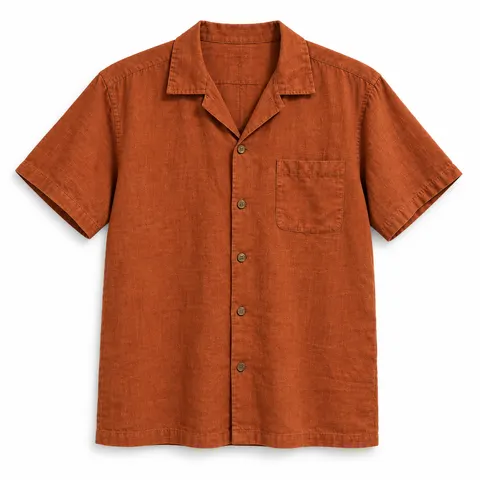
The phone photo, then the same packshot prompt on GPT Image 2.5 Sunburst and on Nano Banana 2.1. Both kept the details; they moved the colour in different directions.
PromptTurn this phone photo into a clean e-commerce clothing packshot of the shirt only on a pure white seamless background (RGB 255,255,255): the shirt shown flat from the front, neatly pressed and symmetrical, sleeves slightly out, soft even studio light, a faint soft shadow, no hanger, no door, no wrinkles. Keep the shirt exactly the same: the rust-orange linen fabric with its slub texture, the open camp collar, short sleeves with a turned hem, five brown buttons down the front and one chest pocket on the wearer's left side. Do not add pockets, buttons, prints or labels. No text, no logos.
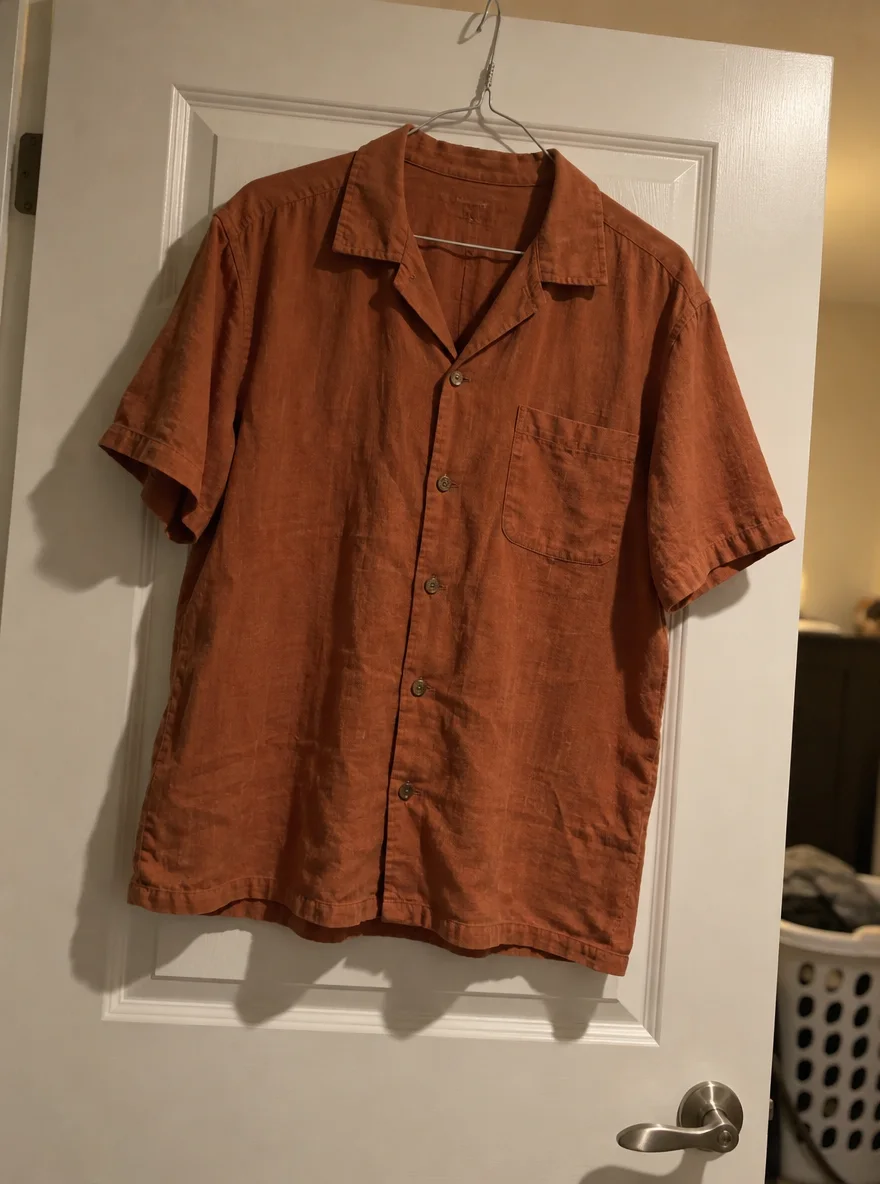 InputPhone photo under a warm ceiling bulb
- GPT Image 2.5 SunburstBrighter rust, same hue; white RGB 254
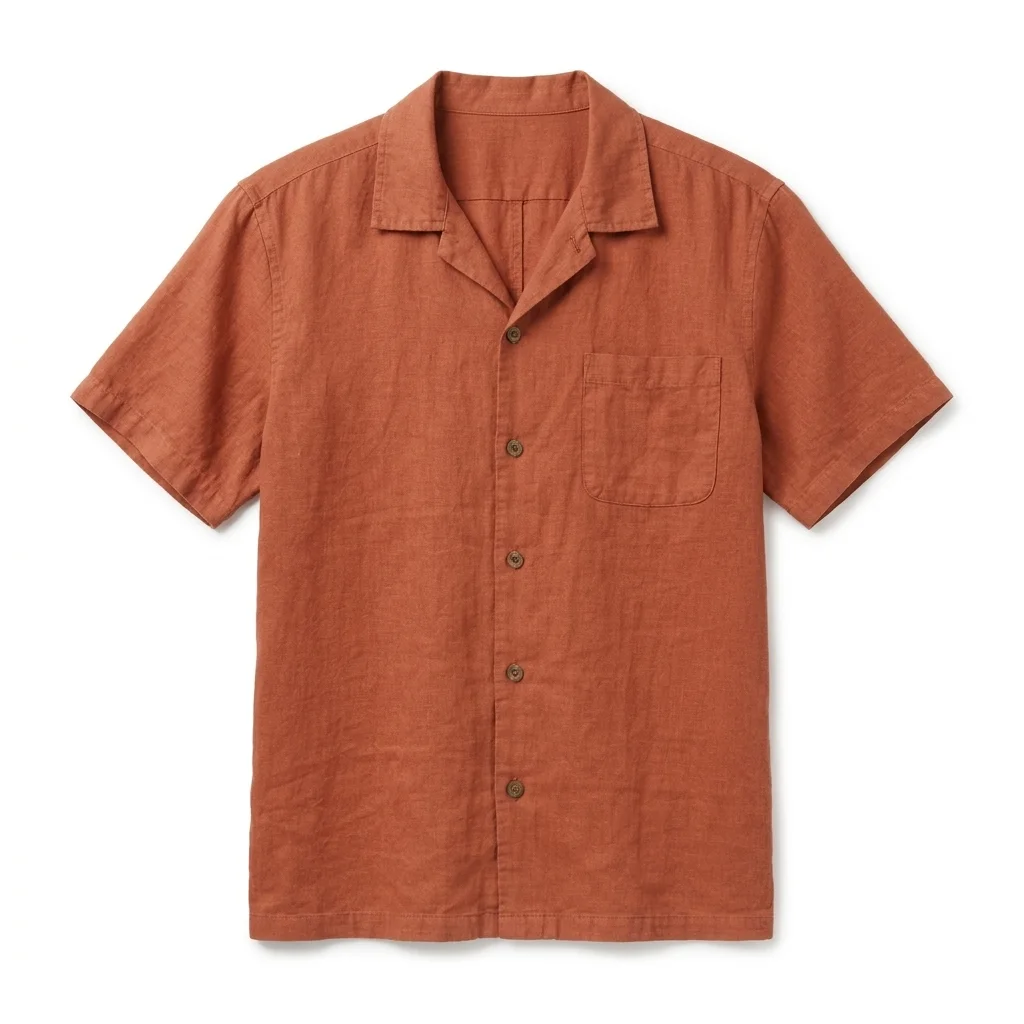 Nano Banana 2.1More muted, pinkish terracotta; white RGB 255
How to
How to use the clothing photography AI
- Time needed
- Steps
- 4 steps
Step 1
Open the clothing tool
Press “Add your photo”: the Image Studio opens with GPT Image 2.5 Sunburst and the white-packshot instruction filled in.
Step 2
Upload the phone photo
The whole garment, front on, on a hanger or laid flat, in daylight. JPG, PNG or WebP. Pick 1:1 for a shop or 4:5 for Instagram.
Step 3
Describe the garment
Add the fabric, colour, collar, buttons and pockets. For an on-model shot, describe a fictional adult model, the pose and the framing.
Step 4
Check and download
Compare colour, buttons and pockets with the real garment, check the corners are white, then download. No watermark.
See it in the app

Open Image Studio and type what you want to see — subject, style, lighting and mood.


Watch the tour · 1:23
Prompts, styles, references, edit, Arena & chat
Chapters
Tips
Clothing photography tips for phone and AI
What matters most when you shoot clothes, and what made the difference in our tests.
Steam or iron the garment first. The AI can smooth creases, but it guesses what is under a deep fold.
Shoot in daylight from a window, not under a ceiling bulb: warm light shifts the colour, and the AI copies the colour it sees.
Hang it on a plain hanger against a plain door or wall, and get the whole garment in frame, front facing the camera.
Name every detail in the prompt: fabric, colour, collar or neckline, sleeve length, number of buttons, which side the pocket is on.
Say “do not add pockets, buttons, prints or labels”. Models like to tidy a design by adding things.
Compare the result with the real garment: button count, pocket side and colour are what to check first.
Use the white packshot as the main image and the on-model shot as the second, so buyers see the fit.
Models
Which model is best for clothing photos?
What each model is good at. Open any one straight in the generator.

OpenAI
GPT Image 2.5 Sunburst
- Reference images
- Up to 16
- Output
- 1K–4K
Open GPT Image 2.5 SunburstBest for
Closest colour to our shirt · white RGB 254
Google
Nano Banana 2.1
- Reference images
- Up to 14
- Output
- 1K–4K
Open Nano Banana 2.1Best for
Details kept, colour more muted · white RGB 255
Bria
Virtual Try-On
- Reference images
- A person photo + 1–3 garments
- Output
- 3:4 and more
Open Virtual Try-OnBest for
Dresses a person photo you have rights to in the garment
Kenerate
Marketing Studio · Studio white
- Reference images
- Your product photo
- Output
- 1:1
Open Marketing Studio · Studio whiteBest for
E-commerce hero on seamless white, no props
FAQ
Clothing Photography AI questions
8 questions

How do I make clothing product photos with AI?
Take a phone photo of the whole garment on a hanger or laid flat in daylight, upload it in Kenerate's Image Studio with GPT Image 2.5 Sunburst and the packshot instruction, and name the fabric, colour, collar, buttons and pockets. The shirt and cardigan above went from a bedroom door and an unmade bed to white packshots in one try each.
Link to this answerCan AI put my clothes on a model?
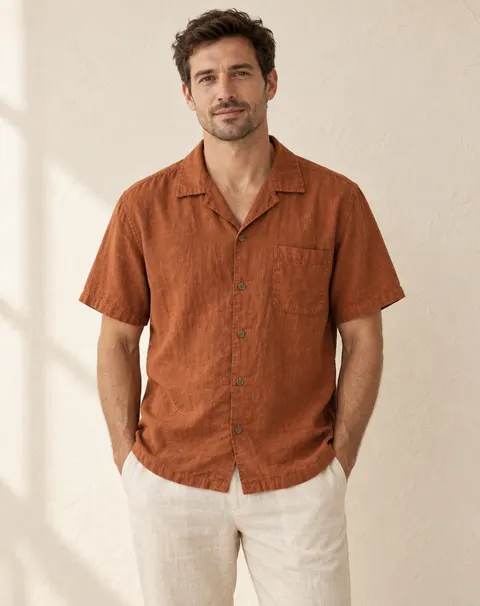
Yes. Upload the garment photo and describe a fictional adult model, the pose and the framing, for example “an adult man in his 30s, facing the camera, framed from mid-thigh up, plaster wall”. Both on-model shots on this page were made that way. Kenerate's Virtual Try-On model can also dress a person photo in your garment, if you have the right to use that photo.
Link to this answerWill AI change my clothes?
It can. The model redraws the garment rather than cutting it out. In our shirt test both models kept the five buttons, the camp collar and the pocket on the right side, but the colour moved: GPT Image 2.5 Sunburst made the rust brighter, Nano Banana 2.1 made it more muted and pinkish. Compare every result with the garment in daylight before you list it.
Link to this answerWhich AI is best for clothing photography?
On our shirt, GPT Image 2.5 Sunburst kept the hue closest to the photo and is the cheaper of the two at 11.7 credits per edit with one photo. Nano Banana 2.1 (21 credits) kept the same details and gave a slightly whiter background (RGB 255 against 254), with a more muted colour.
Link to this answerHow much does AI clothing photography cost?
One GPT Image 2.5 Sunburst edit with one photo costs 11.7 credits at 1K; Nano Banana 2.1 costs 21; Virtual Try-On costs 12. A new Kenerate account gets 25 credits, enough for two Sunburst packshots. Downloads have no watermark.
Link to this answerCan AI put clothes on a white background?
Yes. In our test GPT Image 2.5 Sunburst returned RGB 254 in all four corners and Nano Banana 2.1 returned 255. Both are close enough to pure white for most shops; check the corners after downloading if a marketplace is strict about pure white.
Link to this answerHow do you photograph clothes with a phone?
Steam the garment, hang it on a plain hanger against a white door or lay it flat on a white sheet, turn off the ceiling lights and use window daylight, hold the phone straight on with the 1× lens and tap to focus on the fabric. Then shoot close-ups of the fabric and buttons yourself and use the AI for the white packshot and on-model shots.
Link to this answerIs it okay to sell with AI clothing photos?
Only if the photo still shows the real garment accurately: same colour, buttons, pockets and fabric. Shops and marketplaces expect images to represent the item for sale, and colour differences lead to returns, so keep a real daylight photo in the listing and say on-model images are generated if your shop requires it.
Link to this answerIn depth
Clothing Photography AI, explained
What works, what to avoid, and how to pick a model.
On this page
Clothing photography at home: the phone setup
A good input photo makes every AI result better. What to do before you upload:
- Prep: steam or iron, lint-roll, cut loose threads, button it up and smooth the collar.
- Light: daylight from a window to one side, ceiling lights off. Overcast days give the softest light.
- Hanging: a plain wooden or slim hanger on a white door or wall, the garment facing the camera, nothing behind it.
- Flat lay: on a white sheet or card on the floor, shot from straight above with the phone level.
- Lens and colour: use the 1× lens, tap to focus on the fabric, and hold a white card in one frame so you can check the colour later.
- Details: shoot close-ups of the fabric, buttons and labels yourself; buyers trust real detail shots.
Clothing photo prompts to copy
Upload the garment, keep the instruction's “keep the garment exactly the same” line with your details, and swap the scene:
- White packshot: “shown flat from the front, pressed and symmetrical, pure white seamless background, soft even light, faint shadow”.
- On model: “worn by a fictional adult model in their 30s, facing the camera, framed from mid-thigh up, plain plaster wall, daylight”.
- Lifestyle: “worn by an adult model walking along a sunny street, candid, shallow depth of field”.
- Hanger shot: “on a wooden hanger against a plain linen-white wall, soft daylight, no other objects”.
- Flat lay: “laid flat from above on light oak with a straw hat and sunglasses at the edges”.
What it doesn't do
It doesn't photograph your garment; it redraws it from your photo. Colour is the detail most likely to shift, as our two-model test shows, followed by small parts such as button counts and pocket position. Describe them in the prompt, check the result against the garment in daylight, and keep at least one real photo in the listing when the exact colour matters.
By the Kenerate AI teamLast updated and reviewed
We build and run the Kenerate generator. Every example is a real output of the model named under it; models and presets were checked against the app's code.
Sources: Kenerate Image Studio · Kenerate Marketing Studio