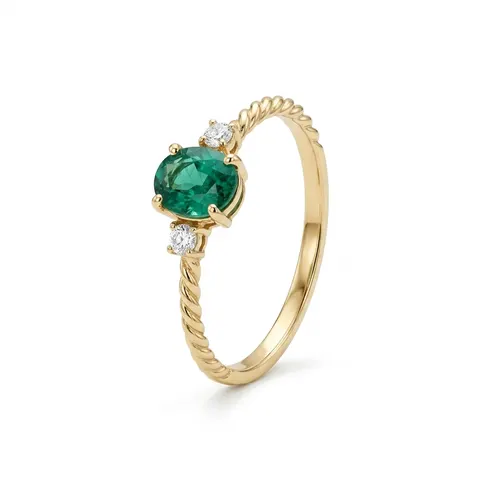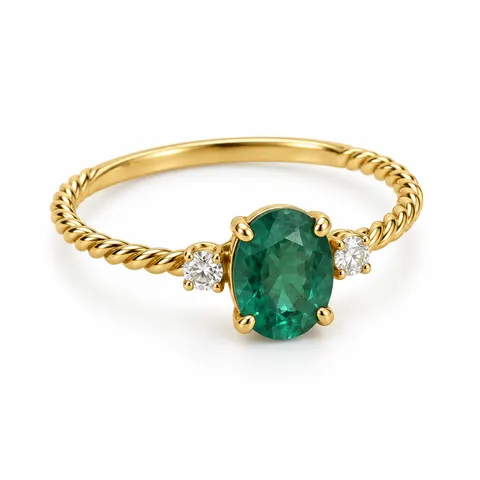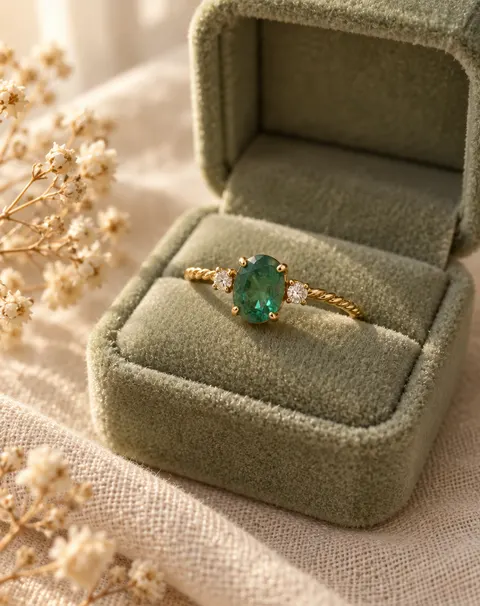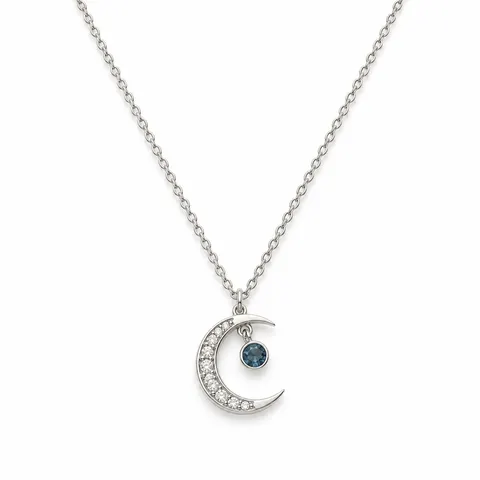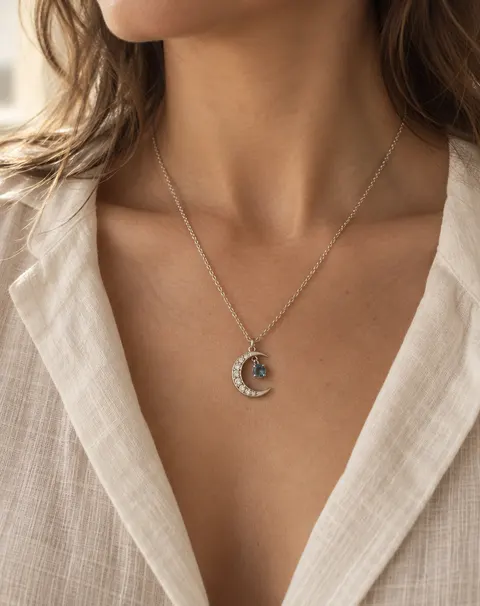

Rings · necklaces · white packshot · lifestyle · on model
Jewelry Photography AI
Upload a phone photo of a ring, necklace or earrings. The AI removes the table, glare and clutter and gives you a pure-white packshot, a styled lifestyle shot or the piece worn by a model, keeping the stones, prongs and metal.
- Pure white background
- Lifestyle and on-model shots
- Stones and settings kept
- No watermark
Updated by the Kenerate AI team




On this page
Quick answer
How do I make jewelry product photos with AI?
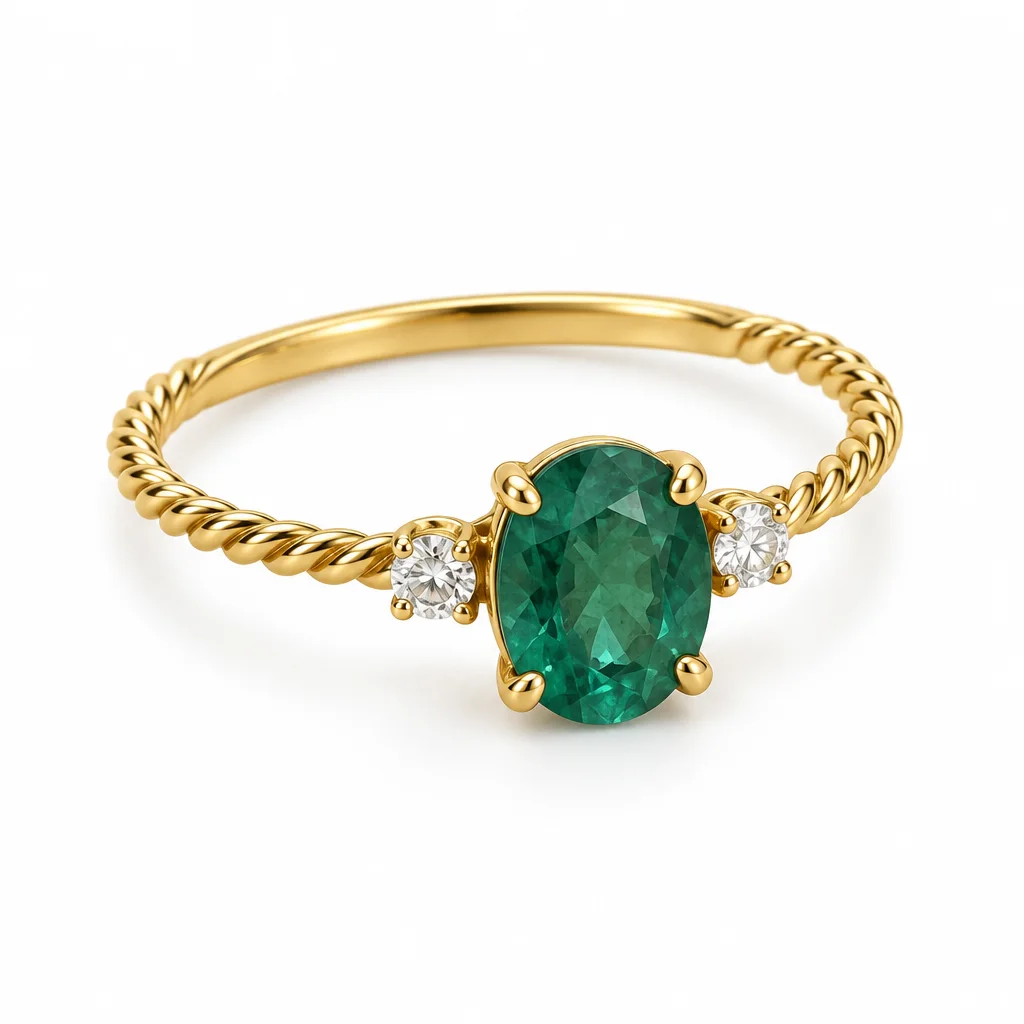
Jewelry photography AI turns a phone photo of a piece into a clean product photo. On Kenerate, upload the photo with GPT Image 2.5 Sunburst (11.7 credits at 1K) and the packshot instruction: it removes the table and glare and returns a pure-white background (RGB 254). It kept our ring's prongs, side stones and rope band, but brightened the stone, so check colours.
Key facts
- Starts from
- A phone photo of a ring, necklace, earrings or bracelet
- Makes
- White packshot · lifestyle shot · on-model shot
- Best model in our ring test
- GPT Image 2.5 Sunburst
- Background
- RGB 254 (Sunburst) · 255 (Nano Banana 2.1)
- Watch for
- Stone colour, stone count, setting type
- Shape
- 1:1 for shops · 4:5 for Instagram
- Watermark
- None
Before / after
Jewelry photography AI: real before and after
Phone photos of a ring and a necklace turned into white packshots and lifestyle shots, one try each. Drag the slider to compare.
Gallery
The second model in our ring test
Nano Banana 2.1 on the same ring photo and prompt. Open it to copy the prompt.
Same prompt
Same ring, two models
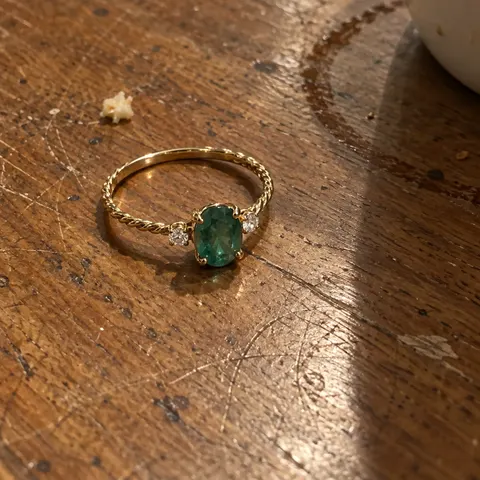
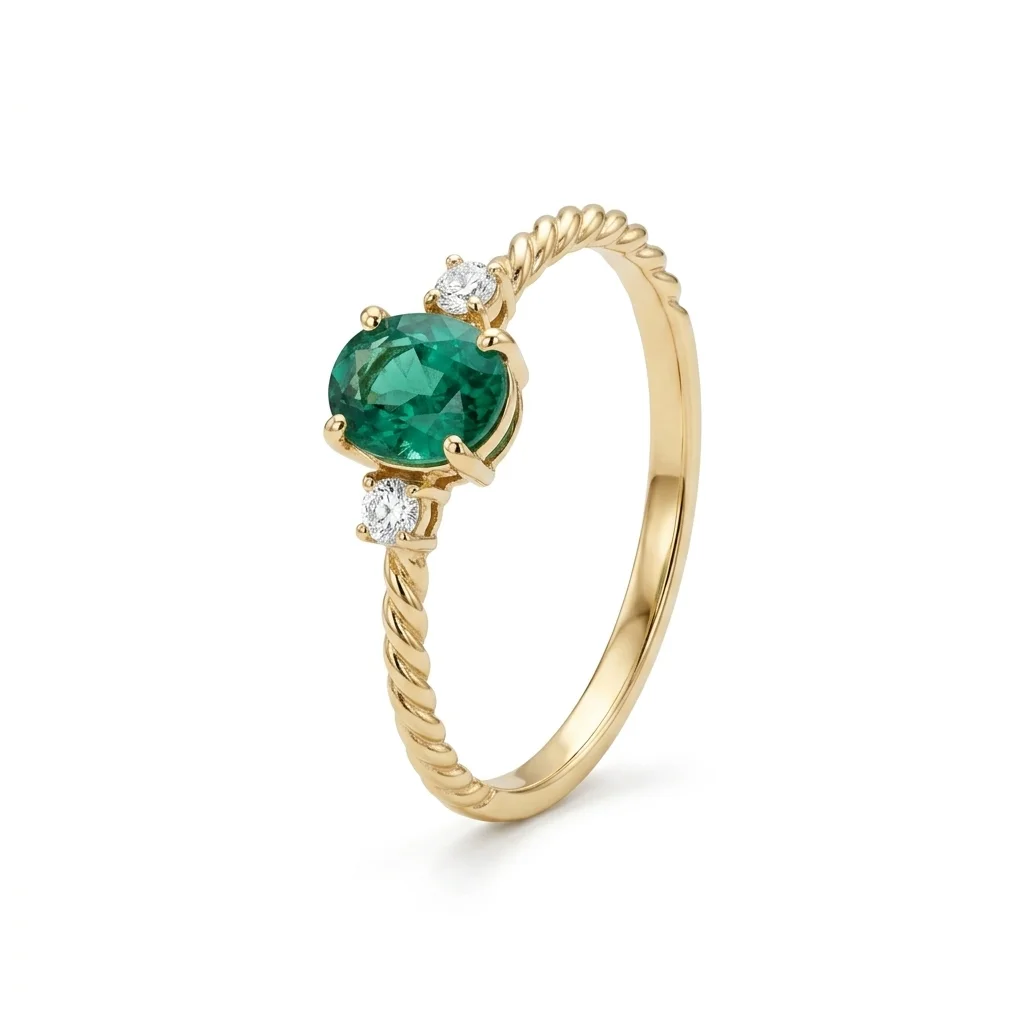
The phone photo, then the same packshot prompt on GPT Image 2.5 Sunburst and on Nano Banana 2.1. Both gave a white background; they changed different things.
PromptTurn this phone photo into a clean e-commerce jewelry packshot of the ring only on a pure white seamless background (RGB 255,255,255): the ring standing upright at a slight three-quarter angle so the stone faces the camera, soft even studio light, a faint soft contact shadow, sharp focus on the stone, no table, no crumbs, no glare. Keep the ring exactly the same: the yellow gold, the oval emerald-green stone in four claw prongs, one small round white diamond on each side of it, and the band with a twisted rope pattern on the front half and smooth plain gold on the back half. Do not add stones, engraving or decoration. No text, no logos.
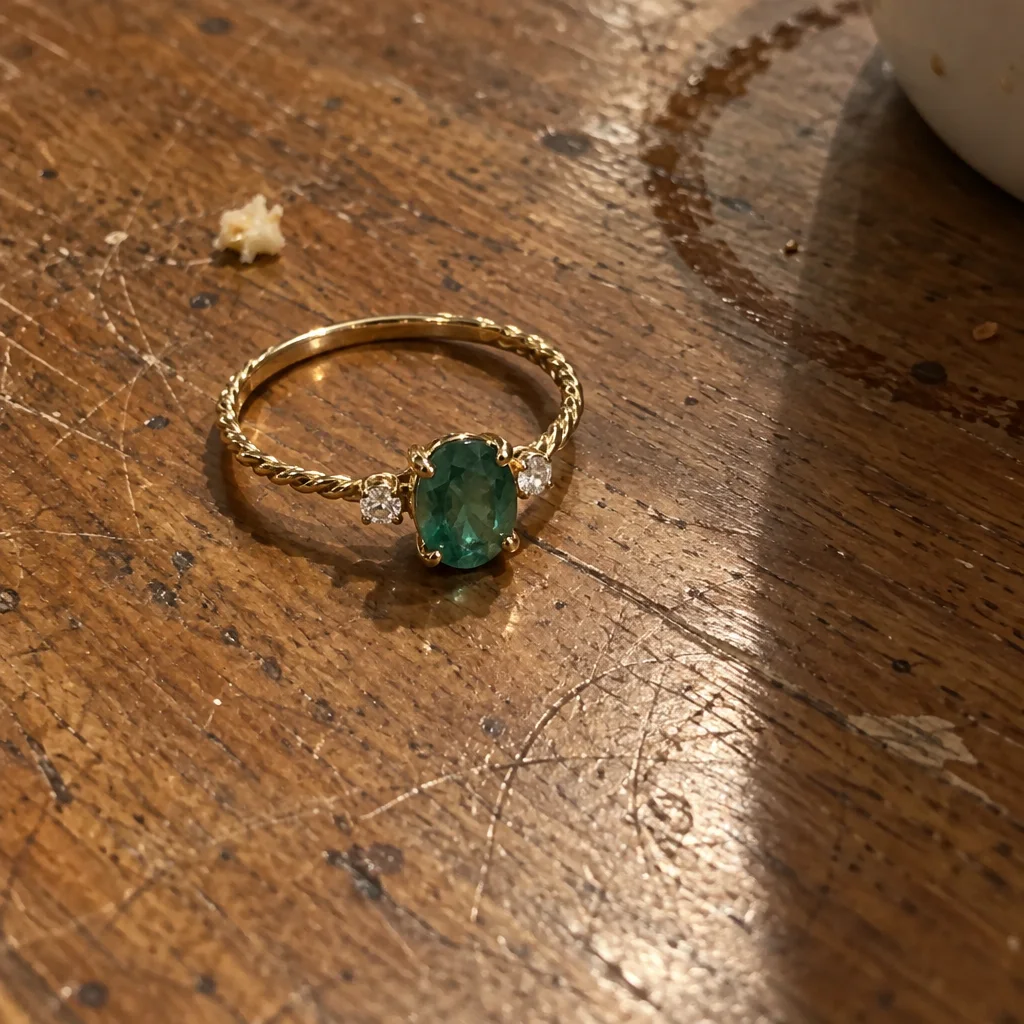 InputPhone photo on a wooden table
- GPT Image 2.5 SunburstSame angle, details kept; stone brighter green
 Nano Banana 2.1Stood upright as asked; more redrawn, stone vivid emerald
How to
How to use the jewelry photography AI
- Time needed
- Steps
- 4 steps
Step 1
Open the jewelry tool
Press “Add your photo”: the Image Studio opens with GPT Image 2.5 Sunburst and the white-packshot instruction filled in.
Step 2
Upload the phone photo
One piece, in focus, in soft light. JPG, PNG or WebP. Pick 1:1 for a shop or 4:5 for Instagram.
Step 3
Describe the piece
Add the metal, each stone's shape, colour and setting, and the band or chain. For a lifestyle shot, describe the scene too.
Step 4
Check and download
Compare stones, colours and settings with the real piece, check the corners are white, then download. No watermark.
See it in the app

Open Image Studio and type what you want to see — subject, style, lighting and mood.


Watch the tour · 1:23
Prompts, styles, references, edit, Arena & chat
Chapters
Tips
Jewelry photography tips for phone and AI
What matters most when you shoot jewelry, and what made the difference in our tests.
Shoot in soft daylight near a window, not under a ceiling lamp: hard light makes glare the AI has to guess around.
Fill the frame with the piece and tap to focus on the main stone. A sharp input gives a sharp packshot.
Name every detail in the prompt: metal colour, stone shape and colour, how many side stones, prong or bezel setting, band pattern.
Say “do not add stones, engraving or decoration”. Models like to add sparkle.
Compare the result with the real piece at 100%: stone colour, stone count and setting type are what drifted in our tests.
Use the packshot for the main image on white and the lifestyle or on-model shot for the second and third images.
Models
Which model is best for jewelry photos?
What each model is good at. Open any one straight in the generator.
OpenAI
GPT Image 2.5 Sunburst
- Reference images
- Up to 16
- Output
- 1K–4K
Open GPT Image 2.5 SunburstBest for
Kept our ring's angle and details · white RGB 254
Google
Nano Banana 2.1
- Reference images
- Up to 14
- Output
- 1K–4K
Open Nano Banana 2.1Best for
Followed the pose, redrew more · white RGB 255
Kenerate
Marketing Studio · Studio white
- Reference images
- Your product photo
- Output
- 1:1
Open Marketing Studio · Studio whiteBest for
E-commerce hero on seamless white, no props
FAQ
Jewelry Photography AI questions
8 questions

How do I make jewelry product photos with AI?
Take a sharp phone photo of the piece in soft light, upload it in Kenerate's Image Studio with GPT Image 2.5 Sunburst and the packshot instruction, and name the metal, stones, settings and band. The ring and necklace above went from a kitchen table and a bedsheet to white packshots in one try each.
Link to this answerCan AI put my jewelry on a white background?
Yes. In our ring test GPT Image 2.5 Sunburst returned a background of RGB 254 in all four corners and Nano Banana 2.1 returned 255, both close enough to pure white for a shop's main image. Check the corners after downloading and whiten them if a marketplace is strict.
Link to this answerWill AI change my jewelry?
It can. The model redraws the piece rather than cutting it out, so in our tests the ring's stone came out a brighter green, and the necklace's prong-set stones turned into smaller pavé stones with a darker blue drop. Naming the settings in the prompt helped: the on-model necklace kept its prongs. Compare every result with the real piece before you list it.
Link to this answerWhich AI is best for jewelry photography?
On our ring, GPT Image 2.5 Sunburst kept the piece most faithfully: same angle, four prongs, both side stones and the half-rope band. Nano Banana 2.1 followed the “stand it upright” instruction, which meant redrawing more of the ring, and made the stone a more vivid emerald. Sunburst is also cheaper per edit.
Link to this answerHow much does AI jewelry photography cost?
One GPT Image 2.5 Sunburst edit with one photo costs 11.7 credits at 1K; Nano Banana 2.1 costs 21. A new Kenerate account gets 25 credits, enough for two Sunburst packshots. Downloads have no watermark.
Link to this answerCan I show my jewelry on a model?
Yes. Upload the piece and describe a fictional adult model and the framing, for example “close-up from just below the chin to the collarbones, ivory linen top”. Our necklace was placed on a generated adult model that way. Don't use photos of real people without their permission.
Link to this answerHow do you photograph jewelry with a phone?
Put the piece on a plain matte surface near a window, turn off the ceiling light, use the 1× or 2× lens rather than digital zoom, tap on the main stone to focus and lower the exposure a little so metal doesn't blow out. A white card opposite the window fills the shadows. Then use the AI to clean the background or restage it.
Link to this answerIs it okay to sell with AI-edited jewelry photos?
Only if the photo still shows the real piece accurately: same stones, colours, settings and metal. Many marketplaces require images to represent the item for sale, so don't let the AI add stones or change colours, and keep your own phone photo as a detail shot if colour matters.
Link to this answerIn depth
Jewelry Photography AI, explained
What works, what to avoid, and how to pick a model.
On this page
Jewelry photography at home: the phone setup
A good input photo makes every AI result better. What to do before you upload:
- Light: daylight from a window to one side, ceiling lights off. Tape baking paper over the window if the sun is direct.
- Surface: a plain matte card, white or grey. Avoid glossy tables that reflect.
- Lens: 1× or 2×, held close; don't use digital zoom. Use macro mode for small earrings.
- Focus and exposure: tap on the main stone, then slide exposure down slightly so silver and gold keep their detail.
- Angles: front, three-quarter and side for rings; flat in a V for necklaces; pairs side by side for earrings.
Jewelry photo prompts to copy
Upload the piece, keep the packshot instruction's “keep the piece exactly the same” line, and swap the scene:
- White packshot: “pure white seamless background, soft even studio light, faint contact shadow, sharp focus on the stones”.
- Ring box: “resting in the slot of an open sage-green velvet ring box on cream linen, dried flowers, morning window light”.
- Marble: “on white marble with soft side light and a single eucalyptus leaf, shallow depth of field”.
- Dark luxury: “on black velvet, one narrow beam of light, deep shadows, sparkle on the stones”.
- On model: “worn by a fictional adult woman, close-up from just below the chin to the collarbones, ivory linen top, daylight”.
What it doesn't do
It doesn't photograph your piece; it redraws it from your photo. Stone colours, the number of tiny stones and the setting type are the details most likely to change, as our necklace packshot shows. Describe them in the prompt, check the result at full size, and keep a real photo of the piece in your listing when exact colour matters.
By the Kenerate AI teamLast updated and reviewed
We build and run the Kenerate generator. Every example is a real output of the model named under it; models and presets were checked against the app's code.
Sources: Kenerate Image Studio · Kenerate Marketing Studio